-
Extending Hearing Aid Lifespan: 3 Daily Cleaning and Drying Rules
Do you want to prevent sudden digital hearing equipment breakdowns? Daily home maintenance habit extends electronic instrument operational lifespan significantly. Moreover, managing internal humidity prevents delicate motherboard component corrosion issues. Consequently, practicing daily cleaning routines ensures crystal-clear acoustic quality always. In this expert guide, you will learn practical daily care rules.
1. Storing Devices Inside Dehumidifiers Nightly To Eliminate Internal Moisture
Ear canals trap body heat and sweat inside every day. Therefore, placing devices inside specialized dehumidifier boxes removes internal humidity.
Moreover, opening battery doors allows moisture to evaporate completely.
Consequently, electronic drying boxes prevent costly internal circuitry corrosion.
In addition, integrated ultraviolet lights sanitize ear mold surfaces effectively.
2. Brushing Receiver Ports Daily To Remove Microscopic Earwax Accumulation
Trapped earwax clogs delicate digital speaker outlets over time. Therefore, brushing surface nozzles gently prevents unwanted sound output blockages.
First, hold hearing devices downward while brushing away debris.
In addition, replacing earwax guard filters maintains optimal sound output.
Furthermore, clean microphone openings to preserve automatic sound directionality.
3. Avoiding Direct Water Contact and Cosmetics To Prevent Port Clogs
Electronic components suffer damage from hairspray and liquid exposure. Therefore, removing devices before showering protects delicate internal circuitry completely.
Therefore, apply cosmetic hair products fully before inserting devices.
Furthermore, wipe exterior casings gently using soft dry cloths.
Ultimately, maintaining daily cleaning habits guarantees absolute lifelong happiness.
-
보청기 고장 없이 오래 쓰는 법: 매일 실천하는 습기 제거와 청소 습관
고가의 보청기를 구매한 후 얼마 지나지 않아 잔고장이 발생하거나 음질이 저하되어 불편을 겪는 분들이 계십니다. 보청기 고장의 가장 큰 원인은 다름 아닌 ‘귓속 습기’와 ‘귀지 및 이물질 막힘’입니다. 보청기는 귓속의 정밀 전자기기이므로, 매일 밤 1분씩만 투자하여 올바른 관리 습관을 길러주면 고장률을 80% 이상 줄이고 수명을 대폭 연장할 수 있습니다. 오늘 청각 전문가가 보청기를 항상 새것처럼 유지하는 일상 케어 3단계를 정리해 드립니다.
1. 취침 전 보청기 전용 건조기(제습통)에 보관하기
귓속은 열기와 땀으로 인해 늘 습기가 차 있습니다. 습기는 보청기 내부 마이크와 리시버, 메인보드 칩셋을 부식시키는 주범입니다. 따라서 밤에 주무실 때는 보청기를 빼서 배터리 도어를 열어둔 채(충전형은 충전 겸용 건조기에 꽂아) 전용 제습통이나 전자 건조기에 보관해야 합니다. 전자 건조기의 UV 소독 기능까지 활용하면 귓속 세균 번식과 외이도염 예방에도 큰 도움이 됩니다.
2. 전용 솔로 리시버와 마이크 노즐 매일 청소하기
매일 밤 보청기를 뺀 후, 제공된 전용 청소 솔로 리시버(스피커) 노즐과 마이크 입구를 가볍게 털어내야 합니다. 이때 보청기 입구가 아래쪽을 향하도록 들고 털어주어야 귀지가 내부 깊숙이 들어가지 않고 밖으로 떨어집니다. 귀지 방지 필터(왁스가드)에 이물질이 많이 쌓였다면 주기적으로 새 필터로 교체해 주는 것이 좋습니다.
3. 물과 화장품(헤어스프레이) 접촉 원천 차단하기
보청기는 방수 기능(IP68 등급 등)이 강화되어 출시되지만, 완전 방수는 아니므로 수분에 대한 주의가 필요합니다. 세수, 샤워, 수영 시에는 반드시 보청기를 먼저 빼 두어야 합니다. 또한 헤어스프레이나 미스트, 파우더를 사용할 때는 미세 입자가 마이크 구멍을 막을 수 있으므로 화장을 완전히 마친 후 보청기를 착용하는 습관을 가져야 합니다.
-
Hearing Aid Price Differences: 3 Reasons Technology Drives Costs
Are you curious why digital hearing equipment prices vary dramatically today? Hearing device costs depend primarily on internal signal processing channel counts. Moreover, advanced noise reduction algorithms directly dictate overall acoustic technology tiers. Consequently, evaluating your daily active environment helps select reasonable budget options. In this expert guide, you will learn practical price tier guidelines.
1. Understanding Essential Basic Tiers For Quiet Indoor Home Use
Basic economy models offer essential acoustic sound amplification features affordable. Therefore, simple eight-channel instruments satisfy quiet indoor listening needs comfortably.
Moreover, basic devices handle clear one-on-one living room conversations.
Consequently, budget tiers suit seniors spending time primarily at home.
In addition, simple controls ensure easy daily equipment operation always.
2. Exploring Advanced Technology Tiers For Active Outdoor Environments
Mid-range advanced devices feature dynamic automatic noise reduction software programs. Therefore, multi-channel sound processing improves speech clarity inside crowded stores.
First, automatic scene classification switches listening programs real-time today.
In addition, directional dual microphones isolate targeted human voice signals.
Furthermore, mid-range models offer great balance between price and performance.
3. Choosing Premium AI Tiers For Complex Social Hearing Needs
Premium flagship devices utilize real-time artificial intelligence deep learning chips. Therefore, advanced sensory processors eliminate background noise during large meetings.
Therefore, high-tier instruments deliver crystal-clear audio during music listening.
Furthermore, wireless Auracast features ensure complete public venue connectivity.
Ultimately, selecting your ideal technology tier guarantees absolute lifelong happiness.
-
보청기 가격 차이 왜 날까? 등급별(경제형·고급형) 기능과 선택법
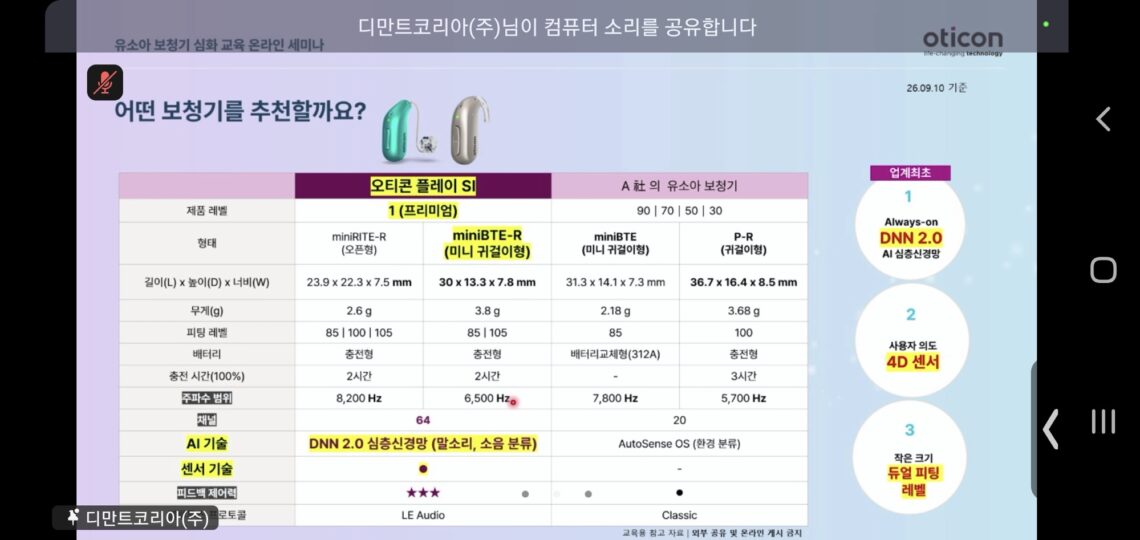
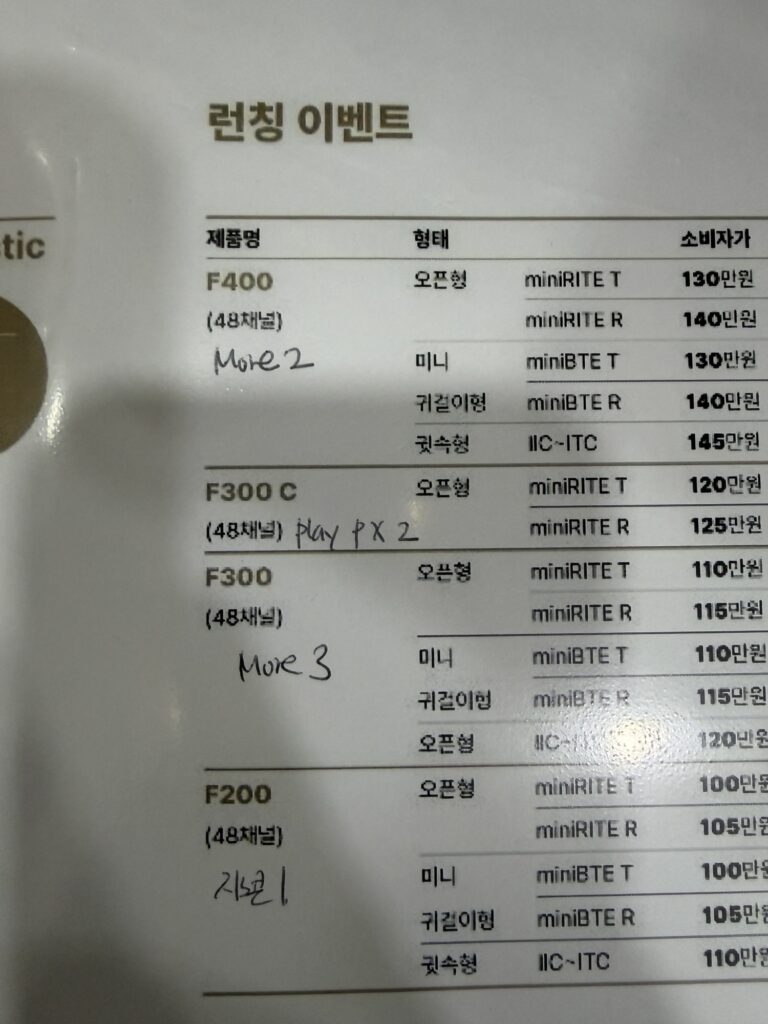
보청기 가격을 알아보시다 보면 수십만 원대부터 수백만 원대까지 천차만별인 금액 때문에 “대체 무슨 차이가 있을까?” 하고 의아해하시는 분들이 많습니다. 보청기 가격 차이는 단순히 브랜드의 이름값이 아니라, 내부에 탑재된 칩셋의 성능, 독립적인 주파수 조절 채널 수, 그리고 시끄러운 환경에서의 소음 제어 기술 수준에 따라 결정됩니다. 비싼 제품이 무조건 좋은 것이 아니라, 본인의 생활 패턴에 맞는 등급을 선택하는 것이 중요합니다. 오늘 청각 전문가가 보청기 등급별 차이점과 선택 가이드를 정리해 드립니다.
1. 경제형/기본형 등급 (100만 원~200만 원대)
특징: 8~12채널 수준으로, 필수적인 소리 증폭 기능과 기본적인 잡음 제어 기능이 탑재되어 있습니다.
추천 대상: 주로 집안에서 생활하시거나, 조용한 환경에서 가족들과 1대1 대화를 주로 나누시는 어르신들에게 적합합니다. 야외 활동이 적다면 경제적인 기본형으로도 충분히 만족스러운 음질을 경험할 수 있습니다.
2. 고급형 등급 (200만 원~300만 원대)
특징: 16~24채널로 구성되어 주파수별 미세 조율(피팅)이 훨씬 정밀합니다. 자동 환경 인식 시스템이 작동하여 식당, 도로 등 장소 변화에 따라 소리 모드가 자동으로 전환됩니다.
추천 대상: 사회활동을 하시는 중장년층, 동모임이나 마트 등 야외 활동이 빈번한 분들에게 가장 인기 있는 실속형 등급입니다.
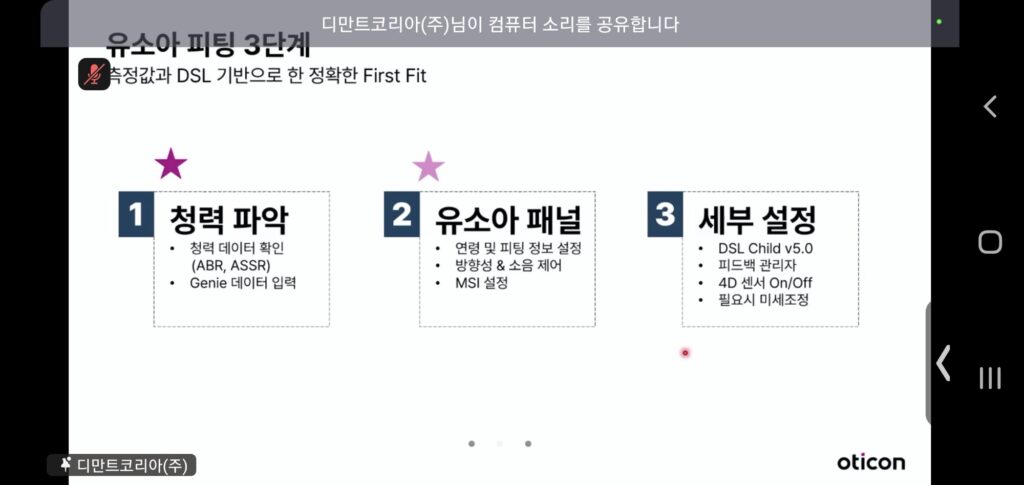
3. 프리미엄형 등급 (400만 원~500만 원 이상)
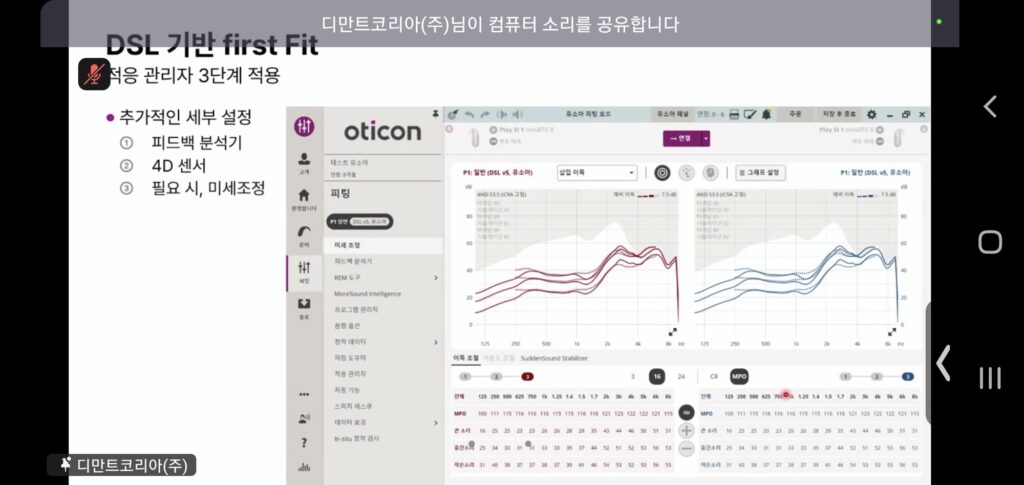
특징: 24채널 이상의 최고급 사양과 실시간 AI 딥러닝 칩셋, 4D 모션 센서, 오라캐스트 등 최첨단 오디오 기술이 집약되어 있습니다. 시끄러운 연회장이나 넓은 울림 공간에서도 말소리만 선명하게 분리해 냅니다.
추천 대상: 경제 활동이 활발한 직장인, 강연이나 회의 참석이 많은 분, 음악 감상을 즐기시며 최고의 음질을 원하시는 유저에게 적합합니다.
-
Hearing Aid Receiver Failure: Stop Muffled Sound With UltraVac Care
Is your hearing device suddenly muffled or completely silent? Your digital equipment speaker, called a receiver, probably failed. Long-term earwax and moisture accumulation damage delicate receiver internal components. Moreover, home cleaning cannot remove deeply trapped acoustic blockage. Consequently, professional clinical equipment checks solve speaker issues. In this expert guide, you will learn essential receiver maintenance rules.
1. Understanding Why Earwax and Moisture Block Receiver Sound Output
Small hearing aid receivers insert deeply inside your ear canals. Therefore, continuous earwax accumulation blocks microscopic speaker outlets real-time.
Moreover, trapped personal ear canal sweat enters sound ports.
Consequently, unwanted internal humidity corrodes sensitive electronic speaker diaphragms.
In addition, clogged wax guards prevent amplified acoustic signals from escaping.
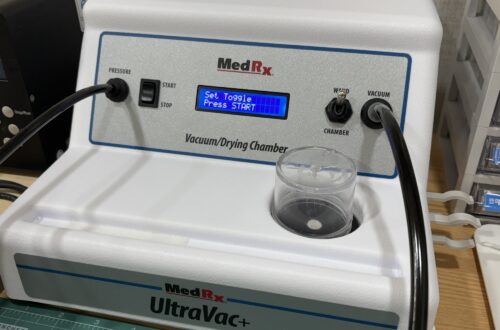
2. Using Professional Clinical Equipment MedRx UltraVac+ for Deep Cleaning
Audological clinics utilize advanced professional equipment for critical receiver maintenance. Therefore, visiting a specialist restores maximum speaker volume performance.
First, vacuum wands safely extract hardened earwax blockages.
In addition, pressurized drying chambers eliminate internal moisture corrosion.
Furthermore, routine professional equipment care extends equipment operational lifespan.
3. Maintaining Your Receiver Daily to Guarantee Continuous Sound Clarity
Cleaning your hearing devices daily prevents common receiver failures. Therefore, adopting a consistent maintenance routine enhances listening happiness.

Therefore, brush away surface earwax from receiver tips nightly.
Furthermore, replace earwax guard filters regularly every few months.
Ultimately, following a dedicated cleaning schedule guarantees lifelong happiness.
-
보청기 소리가 안 들릴 때? 소리의 핵심 ‘리시버(스피커)’ 고장 예방과 수리 장비
잘 사용하던 보청기에서 갑자기 소리가 나지 않거나, 소리가 너무 작게 들린다면 가장 먼저 의심해 봐야 할 부품이 바로 ‘리시버(Receiver)’입니다. 리시버는 증폭된 전기 신호를 우리가 들을 수 있는 소리(음향 신호)로 바꾸어 귀안으로 전달해 주는, 보청기의 ‘스피커’ 역할을 하는 아주 중요한 부품입니다. 특히 귓구멍 깊숙이 삽입되는 형태(RIC형, 귓속형)는 귀지나 습기에 직접적으로 노출되어 고장이 가장 빈번하게 발생합니다. 오늘 청각 전문가가 리시버 고장 원인과 센터의 전문 수리 장비를 활용한 관리법을 정리해 드립니다.
1. 보청기 리시버 고장의 주요 원인 2가지: 귀지와 습기
리시버의 소리 출력구는 매우 미세한 구멍으로 이루어져 있습니다.
귀지 막힘: 귓속에서 분비된 귀지가 리시버 노즐을 꽉 막아 소리가 밖으로 나오지 못하게 합니다. 가정용 솔로 털어내는 것만으로는 내부 깊숙이 박힌 귀지를 제거하기 어렵습니다.
습기 침투: 땀이나 습기가 미세 구멍을 통해 리시버 내부로 들어가면, 내부 부품을 부식시키거나 진동판 작동을 방해하여 잡음을 유발하거나 소리를 완전히 꺼지게 만듭니다.
2. 센터 전용 전문 수리 장비 MedRx UltraVac+의 역할
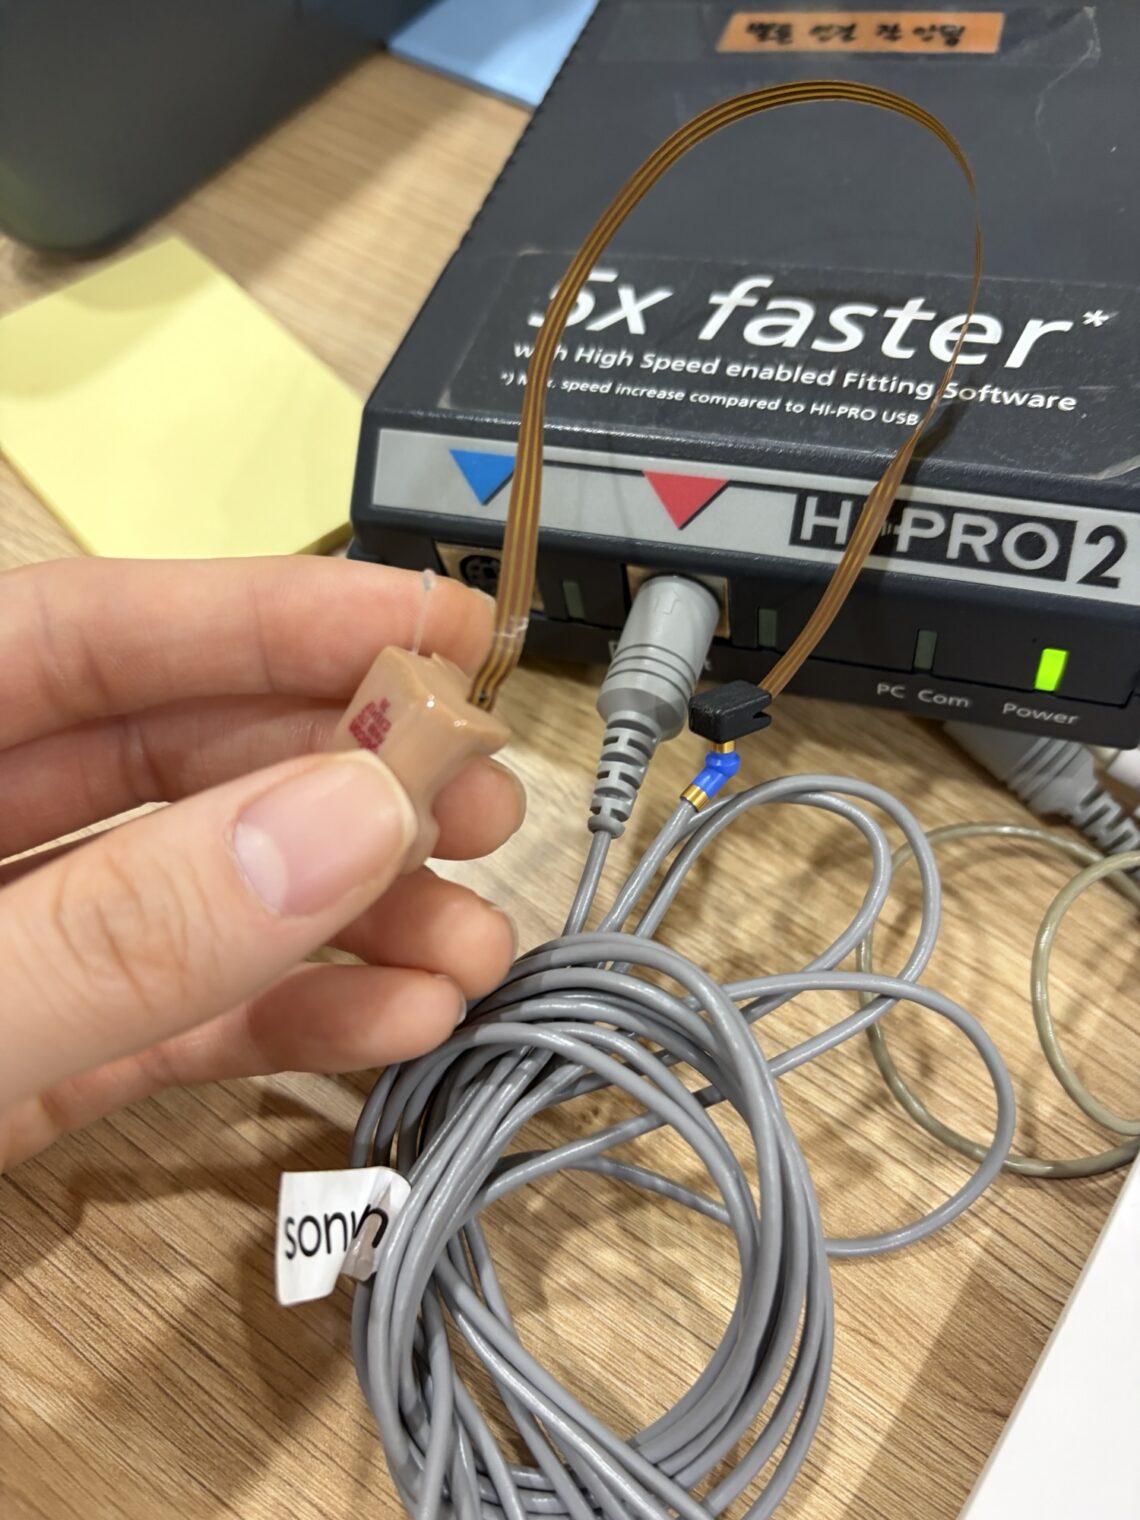
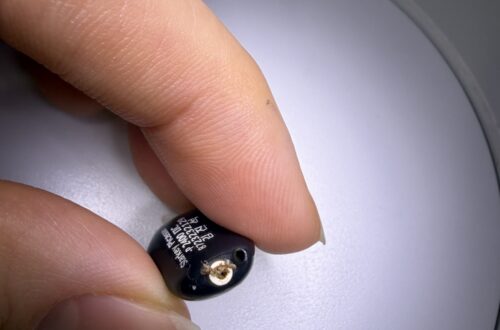
보청기 센터에서는 가정에서 해결할 수 없는 리시버 막힘이나 습기 문제를 해결하기 위해 사진 속 MedRx UltraVac+와 같은 전문 장비를 활용합니다.
강력한 진공 흡입(Vacuum Wand): 리시버 노즐 깊숙이 박혀 있는 미세 귀지와 유분을 기기 손상 없이 안전하고 강력하게 흡입하여 제거합니다.
감압 건조 챔버(Drying Chamber): 보청기 내부 깊숙한 곳에 습착된 미세 수분을 순간적인 기압 저하 방식으로 완벽하게 건조하여 부식을 예방하고 성능을 회복시킵니다.

3. 리시버 수명을 늘리는 올바른 관리 팁
매일 밤 청소: 보청기를 뺀 후 전용 솔로 리시버 주변 귀지를 털어내고, 부드러운 천으로 닦아줍니다.
왁스가드 주기적 교체: 리시버 앞에 장착된 귀지 방지 필터(왁스가드)를 1~2개월마다 새것으로 교체하여 귀지 유입을 원천 차단합니다.
제습 관리 생활화: 사용하지 않을 때는 반드시 보청기 전용 제습통이나 전자 건조기에 넣어 습기를 제거합니다.
-
Comparing Hearing Aid Brands: How to Choose Your Perfect Device Style
Are you confused by numerous hearing device brands and physical styles? Choosing suitable hearing instruments requires evaluating individual audiogram charts carefully. Moreover, personal lifestyle habits influence daily hearing device satisfaction significantly. Consequently, understanding brand features helps you select optimal hearing tools. In this expert guide, you will learn practical selection guidelines.
1. Reviewing Leading Global Hearing Aid Brands and Technical Acoustic Features
Major global manufacturers engineer unique acoustic sound processing features today. Therefore, comparing specific brand strengths simplifies your final purchasing decision.
Moreover, Phonak excels in real-time AI noise reduction performance.
Consequently, Oticon delivers natural 360-degree open soundscape experiences.
In addition, Widex offers crystal-clear music sound reproduction quality.
2. Comparing Physical Device Styles Between Open-Fit RIC and Custom In-The-Ear
Selecting proper physical styles depends on individual ear canal shapes. Therefore, matching device styles prevents uncomfortable daily wearing occlusion issues.
First, receiver-in-canal devices minimize unnatural own-voice echoing effects.
In addition, custom in-the-ear instruments offer discreet cosmetic appearance advantages.
Furthermore, behind-the-ear models provide maximum power output levels.
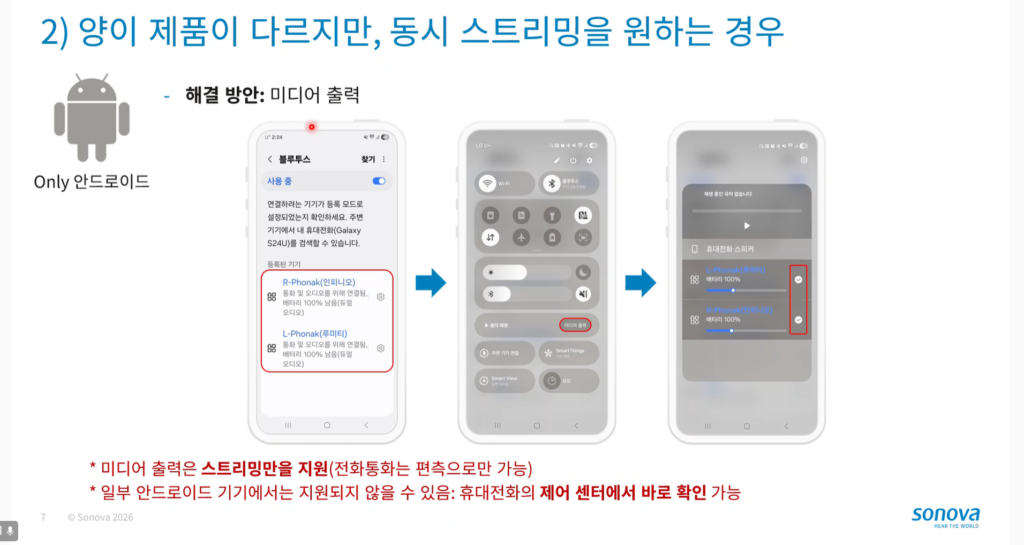
3. Following Three Practical Steps to Select Your Ideal Hearing Instrument
Consulting certified audiologists ensures accurate personalized device fittings always. Therefore, evaluating personal audiograms guides your long-term acoustic happiness.
Therefore, conduct comprehensive pure-tone audiometry exams at clinical centers.
Furthermore, test various demo devices inside real-world environments directly.
Ultimately, selecting personalized fitted hearing aids guarantees absolute happiness.
-
보청기 브랜드 비교와 나에게 맞는 보청기 형태(오픈형·귓속형) 선택법
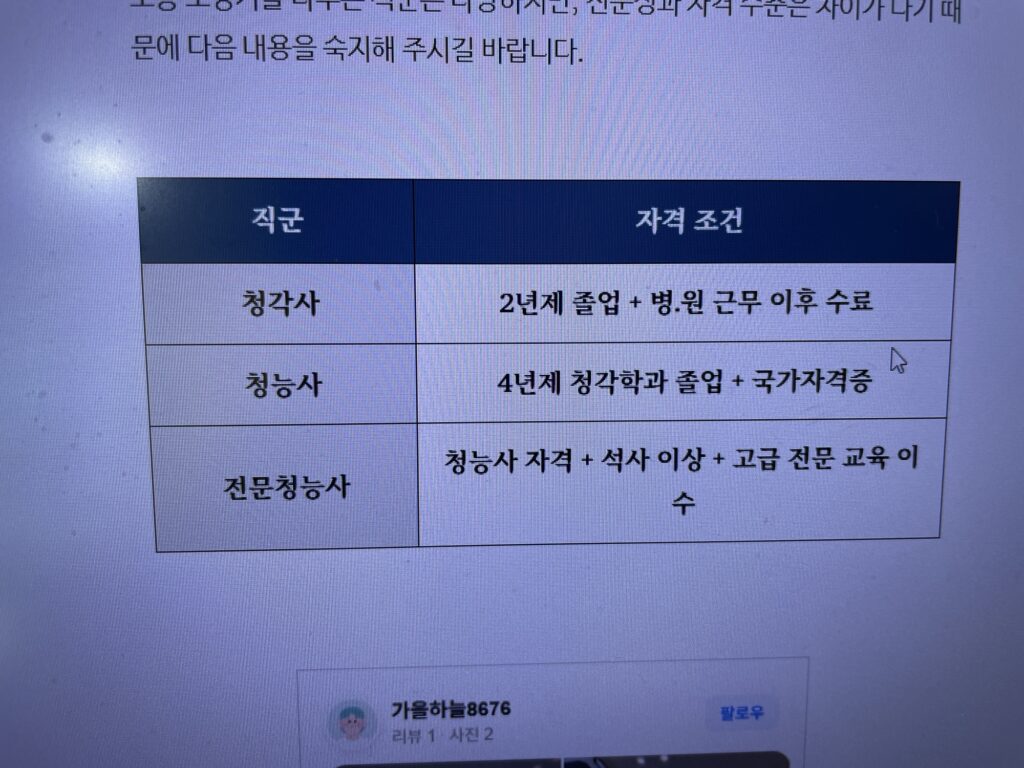
보청기를 알아보실 때 수많은 브랜드와 다양한 모양 때문에 어떤 제품을 선택해야 할지 막막해하시는 분들이 많습니다. 보청기는 단순히 브랜드의 인지도만 보고 결정하는 것이 아니라, 사용자의 청력 상태, 귓속 구조, 평소 생활 환경에 맞춰 ‘브랜드별 음질 특성’과 ‘착용 형태’를 종합적으로 고려하여 선택해야 실패가 없습니다. 오늘 청각 전문가가 보청기 주요 브랜드 특징과 모양별 장단점을 깔끔하게 정리해 드립니다.
1. 세계 주요 보청기 브랜드별 음질 및 기술적 특징
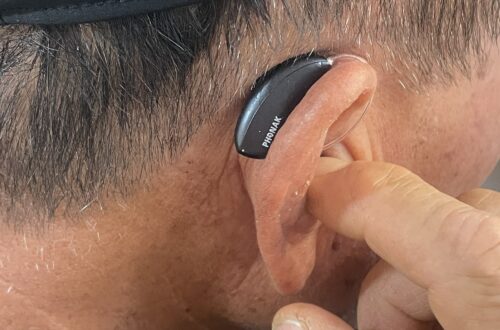
포낙 (Phonak): AI 기반의 소음 제어 기술과 무선 연결성이 매우 뛰어나 시끄러운 환경이나 활동적인 분들에게 유용합니다.
오티콘 (Oticon): 뇌 청각학(BrainHearing) 기술을 바탕으로 360도 주변 소리를 자연스럽고 부드럽게 들려주는 데 강점이 있습니다.
와이덱스 (Widex): 원음에 가까운 맑고 섬세한 고음질을 자랑하며, 음악 감상이나 이명 케어 기능이 우수합니다.
시그니아 (Signia): 본인의 목소리 울림을 줄여주는 기술(OVP)과 감각적인 슬림 디자인(Styletto)이 강점입니다.
2. 착용 형태별 장단점 비교 (오픈형 vs 귓속형 vs 귀걸이형)
오픈형 (RIC): 귀 뒤에 걸치는 형태로, 본인 목소리 울림이 적고 착용감이 매우 편안하여 현재 가장 많이 추천되는 형태입니다.
귓속형 (ITE / CIC / IIC): 귓구멍 안으로 쏙 들어가는 맞춤형 형태로, 겉으로 잘 보이지 않지만 고심도 난청이나 귓구멍이 작은 경우 제약이 있을 수 있습니다.
귀걸이형 (BTE): 출력과 내구성이 높아 심도 난청인이나 유아, 어르신들이 사용하기에 적합합니다.
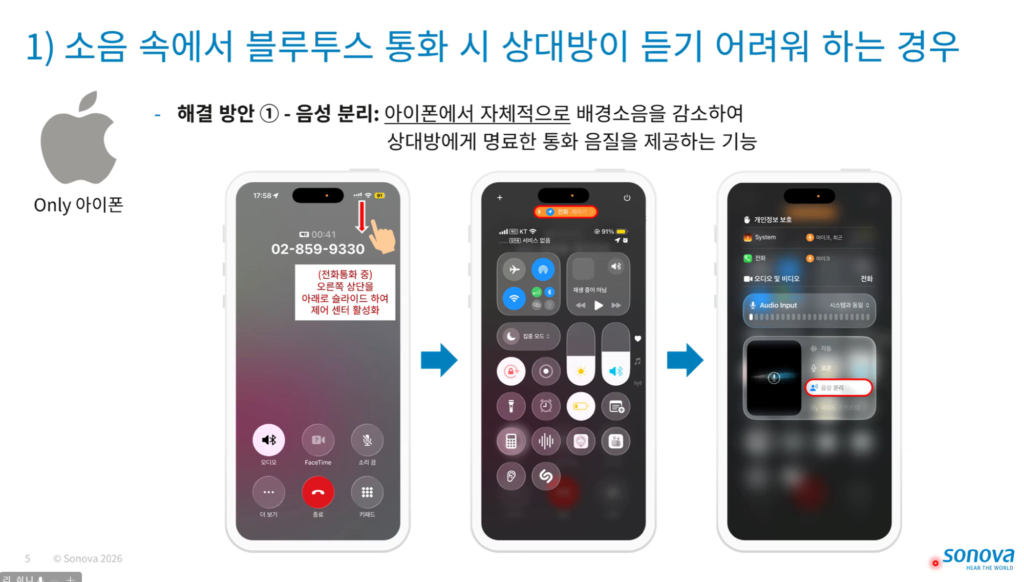
3. 나에게 딱 맞는 보청기를 찾는 3단계 체크리스트
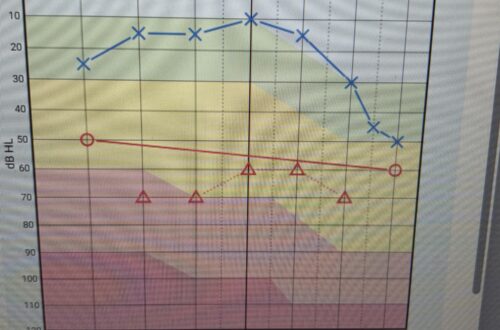
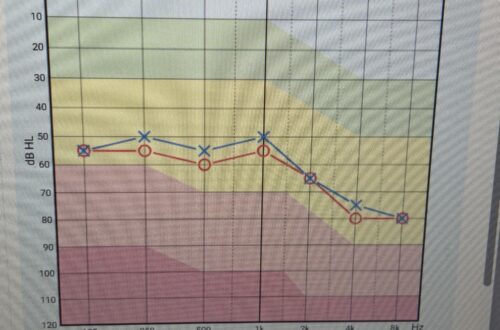
1. 정밀 청력 검사: 고주파수 난청인지, 전체적인 감도 저하인지 청력 그래프를 정확히 확인합니다.
2. 귓속 상태 확인: 귀지의 양, 외이도의 크기와 모양, 중이염 유무 등 신체적 조건을 점검합니다.
3. 생활 패턴 분석: 야외 활동이 많은지, 주로 집에서 TV나 가족 대화를 많이 하는지 고려하여 필요한 기능을 선택합니다.
-
Hearing Aid Adaptation Rules: 1-to-4 Week Step-By-Step Guide
Do your new hearing aids feel overly sharp or noisy initially? Your brain needs gradual time to process restored daily sounds. Moreover, sudden sound exposure overwhelms long-untreated neural auditory pathways. Consequently, following a structured weekly wearing schedule ensures comfortable adaptation. In this expert guide, you will learn practical adaptation rules.
1. Week 1: Wearing Devices Inside Quiet Indoor Rooms Gently
Limit your initial wear time to two hours daily first. Therefore, practice listening to soft home household sounds inside quiet environments.
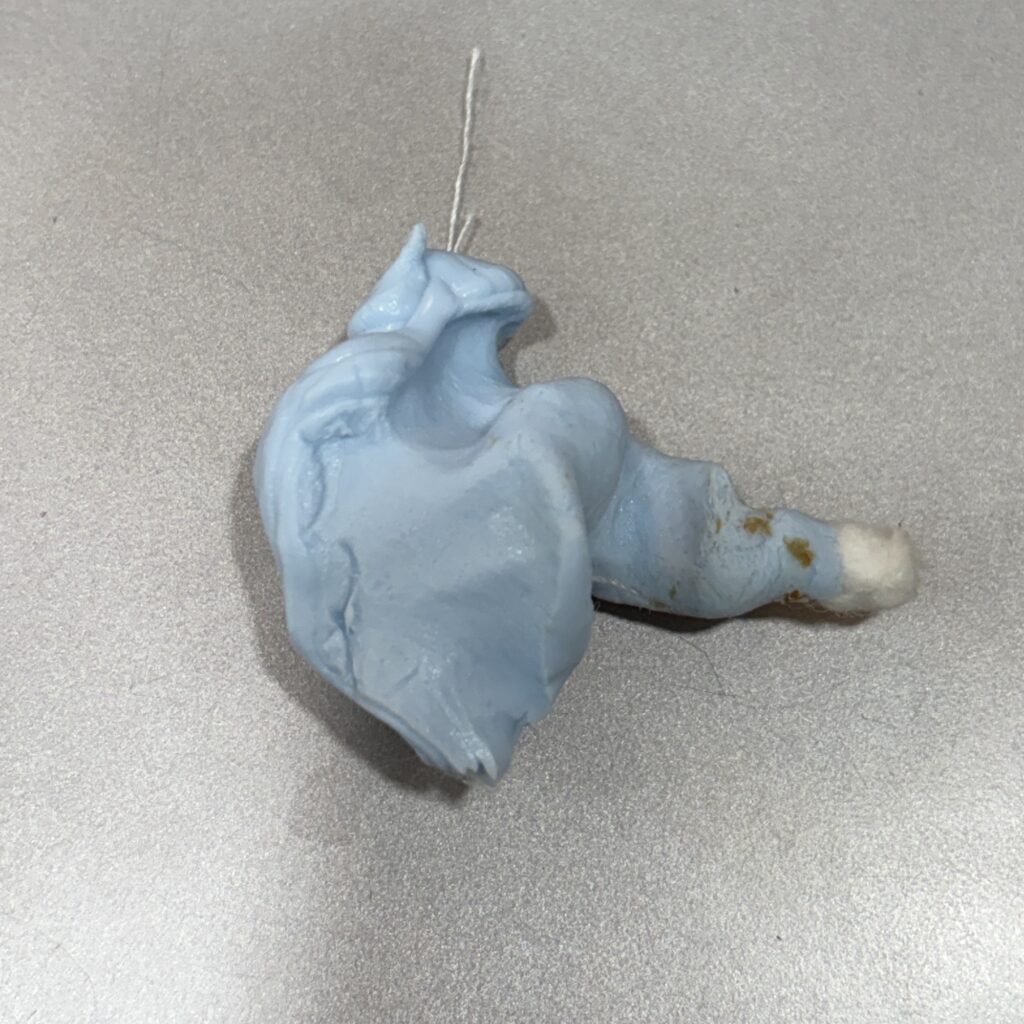
Moreover, avoid noisy outdoor streets during your first adaptation week.
Consequently, short daily wearing sessions prevent mental cognitive fatigue.
In addition, remove devices immediately whenever sound levels feel overwhelming.
2. Week 2: Increasing Wearing Time and Practicing One-On-One Conversations
Expand your daily wearing schedule to four hours inside homes. Therefore, practice talking slowly face-to-face with supportive family members.
First, read printed newspapers aloud to normalize your voice tone.
In addition, practice listening to clear television broadcasts at low volume.
Furthermore, gradual sound exposure builds personal daily listening confidence smoothly.
3. Weeks 3 and 4: Exploring Outdoor Spaces and Fine-Tuning Sound
Wear your hearing instruments outdoors inside neighborhood parks and stores. Therefore, expose your brain to changing real-world environmental background sounds.
Therefore, practice distinguishing human voices amid ambient outdoor noise.
Furthermore, visit your audiologist for necessary secondary clinical fitting checks.
Ultimately, achieving full sound habituation guarantees absolute lifelong happiness.
-
보청기 첫 착용 후 포기하지 않는 1~4주 차 단계별 적응 가이드
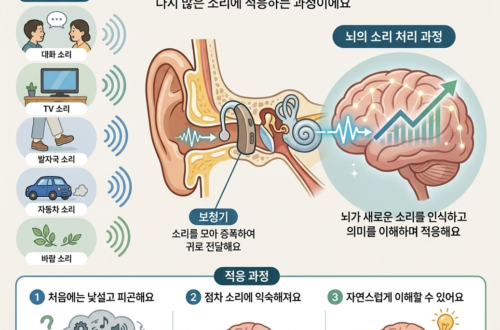
보청기를 처음 구매하고 귀에 끼우면 “생각보다 소리가 날카롭다”, “집안의 냉장고 소리나 시계 소리가 너무 크게 들린다”며 불편함을 호소하시는 분들이 많습니다. 오랜 기간 난청으로 인해 조용한 환경에 익숙해져 있던 ‘뇌’가 갑자기 들어온 수많은 소리 정보에 적응하는 데는 보통 48주 정도의 시간이 필요합니다. 조급한 마음을 버리고 단계별로 착용 시간을 늘려가면 뇌가 소리를 자연스럽게 받아들이게 됩니다. 오늘 청각 전문가가 실패 없는 14주 차 보청기 적응 가이드라인을 정리해 드립니다.
1. 1주 차: 조용한 집안에서 하루 1~2시간 착용하기
첫 일주일은 뇌가 새로운 소리에 놀라지 않도록 조용한 집안 내부에서만 착용하는 것이 좋습니다. TV나 라디오를 끄고 조용한 상태에서 시계 초침 소리, 물소리, 자신의 발자국 소리 같은 미세한 생활 소음을 자연스럽게 받아들이는 연습을 합니다. 하루 1~2시간 정도로 시작하되, 머리가 띵하거나 피로감이 느껴지면 즉시 보청기를 빼고 뇌에 휴식을 주어야 합니다.
2. 2주 차: 착용 시간을 3~4시간으로 늘리고 1대1 대화하기
2주 차부터는 착용 시간을 하루 3~4시간으로 늘리고, 집안에서 가족과 마주 앉아 1대1 대화를 시도합니다. 상대방에게 천천히 또렷하게 말해달라고 요청하고, 신문이나 책을 눈으로 보면서 자신의 목소리로 크게 읽는 ‘낭독 훈련’을 병행합니다. 이 과정은 보청기를 통해 들어오는 자신의 목소리 톤에 뇌가 빠르게 적응하도록 돕습니다.
3. 3~4주 차: 집 밖 야외 활동 및 소음 환경 적응하기
3주 차 이후부터는 하루 5~6시간 이상 착용하며 집 근처 산책로, 마트, 집앞 조용한 카페 등 야외 활동 시에도 보청기를 착용해 봅니다. 자동차 소리, 바람 소리, 주변 사람들의 웅성거림 속에서 말소리를 구분하는 연습을 합니다. 4주 차에 접어들면 시끄러운 식당이나 모임 장소에서도 착용이 가능해지며, 이때 센터를 방문하여 한 달간 느낀 불편점을 바탕으로 2차 정밀 피팅(소리 조율)을 받으면 완성도가 더욱 높아집니다.